Archive | Garage RSS feed for this section

Garage a go-go

23 Jul

As part of our ongoing renovations I needed to replace the old outlet on the back porch, which is part of a bigger project I’ve had on the back burner for a while. The wiring in the garage was not up to our standards and so the only way I could replace the outlet in good conscience was to re-wire the entire garage. As luck would have it I had run a new feeder line from the panel up to the attic above the garage when we were doing work in the kitchen and dining room. The outlet outside in the back was the first order of business but also on the list were the ceiling outlet for the garage door, a new light, a replacement outlet inside the garage, a new outlet and light switch by the rear door, a new outlet in the front and a new outlet and switch for the exterior lights on the garage. I’m already exhausted from just writing that list. The good part of replacing the old outlets is that the Sheetrock in the back of the garage was bashed to hell already so it was easy access.

20140204-085818.jpg
This is after I made a straight cut across the whole damaged area in anticipation of repairing it.
As with most wiring projects the real work is fishing the cable through the walls, at least with the unfinished attic I was able to fully access the wiring from above, and pull most of the wires through where the old wires were. Being a garage there is also no insulation besides the wall against the interior of the house, so that helps make things a little easier as well.
There were a number of challenges involved but I won’t chronicle them all here, instead I’ll move on to the fun stuff.
Over the last few months I’ve been stocking up on some Z wave items to continue our home automation project. The big one I was exited about was the garage door integration with Z wave.

First off, the fact that an integrated product to do this does not exist seems crazy since the internet is full of accounts of people going through this process. Instead, you kind of have to figure out on your own. This required two separate pieces of equipment; a garage door sensor and a relay module.

The sensor is used to indicate whether the door is closed or open, or more accurately closed or not closed. My brother Chris actually was over to help with this part of the installation, which wasn’t too labor intensive but it was good to have another person to bounce ideas off and make sure things weren’t interfering with each other. The sensor works through means of a glass reed switch, which is basically a switch that connects a circuit if it senses a magnet next to it. This is the basis for most door and window sensors used in alarm systems.
The trick was placing it somewhere where the magnet would be able to safely travel with the garage door without interfering with something and mounting the sensor where it wouldn’t be impacted by any of the moving parts. The sensitivity of the magnet switch is pretty precise so the magnet needs to land within a quarter inch of the sensor when it is closed. We played around a bit and found a spot on the frame of the garage door where we could mount the sensor and have the magnet on the edge of one the door panels to just barely scrape by.
I had previously joined the sensor to the Z wave network and tested its functionality prior to mounting it so once it was up we could see right away that it was working. As of now the sensor only sees itself as a door sensor intended for an alarm system environment, which is a little odd because it gives its status as “Tripped”: Yes or No. If the sensor is not detecting the magnet it is considered tripped, which translates to open. Like I said though, a limit of this system is that it can’t really say it’s open, just not closed. If the door was open one inch it would be “tripped”. Many people recommend a camera to confirm whether the door is actually closed or open, which kind of negates the need for sensor, in my opinion. I’m sure we’ll get one anyway, at some point.
We also installed a Z-wave contact closure relay that I wired in to the garage door opener which actually allows us to open or close the door from the remote app. It functions by briefly connecting two conductors on the opener, mimicking what would happen if you hit the button inside the garage. It actually works pretty well, and any shortcomings it does have I think are more of a symptom of the app we use rather than the hardware or installation.
So now that this project is complete we can plug stuff in without having to use a ground lifter and if we go somewhere and think “oh no! Did I leave the garage door open?!” We can check, and if we did we can close it. As an added bonus if I’m too dumb to even realize I left the door open, I was able to program in a timer that emails and texts me if the door is open longer than a half hour.

Teaching an Old Compressor New Tricks

24 Jan

When it gets cold out the low pressure warnings start popping up on the cars and of course you need to pump up those tires a little to get rid of the nagging yellow light (and to keep the tires at a safe and efficient pressure, of course). For a while we were relying on my very handy CO2 tank which is very portable and quick to fill, but through experience we have found that CO2 does not stay in tires for the long term. It sounds like nonsense but apparently the molecules are small enough to seep through the rubber faster than the nitrogen molecules that make up most of compressed air. CO2 is amazing at filling tires quickly in an emergency or for track side or trailhead use, and great for powering air tools but will not sustain tire pressure in the long term. This was very evident when we were trying to use CO2 to maintain the bike tires. I got tired of going down to the local gas stations where you have to either wait on line or pay quarters or deal with unreliable equipment and even sprinklers. (At one point I had a slow leak in my tire and was stopping there every day at around 5am and the sprinklers were on at that time so it was a wet endeavor).
Finally, the other day I decided it was time to get back into the compressed air business. We were on the way home from Townline BBQ and I decided to pick up a cheap air compressor at Harbor Freight to at least have some source of compressed air. Once we got it home I read further into the reviews online and decided it really wasn’t up to snuff and maybe I should return it.
This brings us to my old air compressor.

20140124-111533.jpg

Continue reading

Titus Road, Powered by Honda

26 Nov

20121126-090904.jpg

The day after the hurricane came through, we lost power, as did the majority of Long Island. I am not among the LIPA bashers. All you had to do was drive around a little to see what they were (and still are) up against. The sheer amount of trees that fell down is mind boggling, and it seems like 75% of them fell on roads and power lines. In any event, we were without power… For a few minutes, at least.
Unlike last year’s power outage from Irene we were prepared. We got back from my brother Tim’s wedding on Saturday and got right to work prepping the house. Some of this included getting the Honda EU2000i generator hooked up to the house. A while back I had ordered a transfer interlock for our electrical panel, and had procrastinated on installing it. Obviously, the time had come. There would be no running of extension cords through cracked doors and windows this year, the entire house would be powered up by the generator. I took my amp meter and with Corinne upstairs on the phone I checked the amp draw of various lights and appliances throughout the house. Doing this enabled us to decide what we could use freely, what we could sparingly, and what we should probably avoid using. We found out that heat/ hot water system, since it runs on natural gas, was a pretty small consumer of electricity. It only needs to run the circulators, the combustion fan and the controls. Both refrigerators were also pretty low consumers, except on motor startup. The microwave, toaster oven and hair dryer were on the no-no list.
The generator we have is very small, so it does have limited capacity, but for a house with gas heat, hot water and stove we found it more than met our needs. It is my opinion that most backup generators are oversized. This really came into play when the gas shortage started and we were using about 1/6 as much gas as other people with full size generators. Most people I spoke to were reporting gas usage of 4 to 5 gallons for an 8 hour period. We were using just about 2 gallons for a 24 hour period! Most people were only using their generators in the evening due to the gas shortage and THE NOISE. Over a 6 day period we only shut our generator down 3 times, and that was to change the oil. Besides that it ran constantly for 146 hours. Due to our careful usage we were able to be extremely fuel efficient. Our refrigerator never defrosted because it had power for all but a total of maybe 3 hours. We were careful with lights we used and hand washed the dishes rather than using the dishwasher (although it could handle it). We switched from the big plasma TV to the smaller LCD, which used about 150 watts instead of about 350. Most of our frugalness was to maximize fuel efficiency and keep the generator running nice and quite. Even at its loudest, though, it is probably 1/8 as loud as a standard generator, and at its normal level on Eco mode it is super quite. You can just barely hear the hum inside the house. If any of our neighbors had their generators on, we’d have to open the window to hear our little guy.
I can now fully endorse the Honda EU2000i generator as a durable workhorse that can power our entire house if we are smart about our energy usage. It operated flawlessly for the duration of our power outage. I strongly recommend adding an hour meter to this or any generator that does not have one to keep tabs on maintenance.

Fully Involved

29 Apr

20120429-104225.jpg

I’m diving pretty deep into the lawn tractor to find out why it’s not starting. So far I’ve removed the hood, the air cleaner, the fuel pump, the shifter cover and the fan shroud to try to access the starter. Now I just need to get my hands on a couple fuses so I can see what happens when I turn the key. The starter gear doesn’t seem to be engaging the flywheel, so now I can actually watch it… But I guess I blew the fuse from trying too many times. There also looks to be a fusible link which may have melted so that could be trouble!

Small Engine Repair

25 Apr

Last weekend when we tried to mow the lawn, I went against all good judgement and used gas that I knew was most likely bad from sitting out all winter into the lawn tractor. And it was. It started running like crap instantly. So then I proceeded to drain the gas tank and the gas tanks of all our small power equipment into our largest gas can.

Getting rid of bad gas is a tricky proposal, as it turns out. Finally I asked our mechanic if he knew what to do with it, and he told me he could take the gas for me in his waste tank. They have a Safety Kleen contract to deal with waste fluids from oil changes and other mechanical work.

Anyway, once I had an empty gas can, I was able to fill up with new, 93 Octane gas. The leaf blower actually requires 91, but I figured the 93 would help everything run a little better if they had any residual bad gas in their fuel systems. So I took the 1.5 gallon can and put in Sta-Bil fuel stabilizer and Echo oil mix and mixed the fuel. I then put some fuel in the weed whacker and the leaf blower, pumped the primers, and luckily they both started pretty easily. I let them run for about 5 minutes and they both sound like they are ready to work!

20120425-230905.jpg

I put a little pure gas in the lawn tractor, pushed it out of the garage, and tried to start it. Nothing. Didn’t make a sound when I turned the key. I had forgotten to plug in the Battery Tender, and I had tried to start the tractor a bunch of times when I had put the bad gas in, so after checking out a few things I got out the meter and saw that the battery was only reading 2.5 volts. It really should be 12 or 14, so i’m hoping when the battery charges up it will start.

My last task was to see if I could get the old Stihl chainsaw, that Corinne’s dad gave us, working. I have never gotten this chainsaw to start before. I pulled the spark plug, cleaned all the gunk of it, and tested it by grounding out the body of the plug on the metal of the motor and pulling the string. I saw a spark, so I knew that aspect of the fuel/air/spark equation was good. Next was the fuel, so I poured in some of the mixed fuel and brought the saw outside to try to start it. I put the saw on the ground and gave a few pulls. After the fifth or sixth pull it sounded a little close. Then I realized the throttle has a feature where it can be pinned a full throttle for starting, AND I realized I hadn’t turned on the choke. After I did that it started in about three pulls! I quickly released the throttle, revved it a few times, and it was able to hold a decent idle.

20120425-232303.jpg

Unfortunately, now that I’ve got the engine issue sorted out, there is another issue I have to deal with. There is a nut that tightens down the bar (the thing that the chain rides on), and the cover and the stud has stripped out the aluminum casing of the saw. Due to this the bar is all loose and floppy and won’t stay in place. If it were even possible to use in this state it would be dangerous. I’m hoping the stripped out hole will be able to repaired by drilling out the hole to a bigger size and tapping it for a Heli-Coil insert. I’m going to hopefully find out if this will work by talking to the same mechanic who took the bad fuel off our hands.

No More Winky

19 Mar

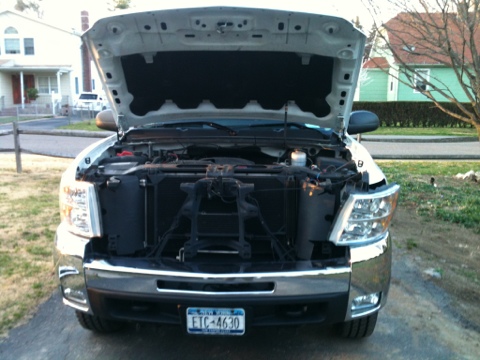
For the last couple of weeks my truck has had one headlight low beam intermittently not working. A few times a swift tap on the headlight got it working, and other times I could tell it was going on and off occasionally by the reflection of a car ahead of me. After about a week I bought a new bulb and replaced the old one, only to find that it was still happening. I then became suspicious of the wiring for the snow plow. The way the headlight harness from the snowplow connects to the truck is a little stupid because they don’t make a plug specifically for this truck, which is basically one of the top 3 most popular plow trucks. Instead you use one that is meant for a 96 ford or something and then like 2 adapters. Lots of places for things to go wrong. GM went out of their way to include an easy to interface with plug and the plow company decided it wasn’t worth making a plug specifically for it. I don’t get it.
One thing GM did NOT go out of their way to do was to make the headlights easy to remove or access, even for a bulb change you need to have tiny arms and about 3 elbows. On the passenger side you either need to remove the air filter assembly or the entire grille of the truck… to simply change a lightbulb!
Since I was going to be working on both headlights I decided to go with the grille removal method.
It’s not especially fun to remove the grille, it involves 10mm bolts, plastic clips and spring tension clips. Then you have to pull two bolts out of the top of the headlights and climb below the splash guard of the inner fender and loosen a bolt behind the bumper, then wrestle the headlights out.

20120319-230125.jpg

I decided to disconnect the light components of the plow entirely to avoid any other problems over the summer. As I had predicted, the plow harness was the culprit and I am happy to report that we’re seeing with two eyes again!

20120319-230604.jpg

So, what does all this have to do with our house? Well, it was done in the driveway, right? And if you read this blog you know that he’s a big part of our operation here at Titus Road, so I think he deserves to be part of it.
🙂

The Attic Door

1 Dec

After having gone in and out of the attic a bunch of times through the tiny hole in the top of the hall closet, using a variety of devices and ladders to get up there, we knew it was time to put a real pull down ladder in. However, the last thing we wanted was a giant hole in the ceiling somewhere. We had a pull down ladder right in our bedroom in Sea Cliff, and while it was convenient, it was not aesthetically pleasing in the least.
We decided the garage would be the best place to cut a giant hole in the ceiling for the door. Obviously we won’t mind how it looks there, and because the garage is not a conditioned space it’s not a big deal if it gets cold in there. This has been an issue with the 16″x16″ hole in the closet, insulated  from the cold of the attic with only a piece of 1/4″ plywood. Now we can seal that hole up and insulate it, and now the bathroom should stay warmer, because it is directly next to that closet.

Follow along with some pictures of the install:

20111201-234431.jpg

Cutting some decking out to make room for the rough opening.

20111201-235129.jpg

A (skewed) picture of the completed rough opening from below.

20111202-000156.jpg

The door in place, supported by a couple 5/4 x 3" boards screwed in from below. The boards were screwed in beforehand, and then the door was lifted up between them and dropped into place. This is much easier than trying to juggle it while screwing it in.

20111202-000723.jpg

The door initially open for attaching the frame to the rough opening. It has to be lowered down so you can access the edges to screw it in.

20111202-001200.jpg

The only thing left to do was to cut the feet to match the floor. This ladder can fit up to a 10 foot ceiling and the ceiling in the garage is about 9'6" so we needed to cut about 6 inches off and match the angle to the floor.

We’re still doing some electrical work here and there, which requires going into the attic, and we want to do some work with the insulation as well, so it will really be much easier now and better for that kind of stuff to be going through the garage, rather than squeezing through a small hole in the closet! Now I just need to replace that old drywall between the chimney and the door that I damaged during the install. I think we’re also going to sheet the door panel itself with drywall for fire safety, and fill the cracks with great stuff to stop air flow.

Belt Adjustment

11 Sep

I was mowing the lawn yesterday when I suddenly realized I was no longer mowing, but instead, simply driving around the lawn tractor. I drove around front and pulled in to the garage to investigate, this was also a good opportunity to try out the new floor jack again.

20110911-044725.jpg

A bit unnecessary, perhaps, but fun nonetheless. This did allow me to get a good clean look under the cutting deck and inspect for obstructions and damage. Nothing significant but the blade could use a sharpening for sure. When I was down there it became clear that the belt had come off one of the pulleys that drive the blades. Unfortunately it was not as simple as I thought it might be to just slip it back on. I was able to find the source of the dislocation which was a little piece of a stick that got lodged in the pulley and derailed the belt. I needed to use a screw driver to get it out.

20110911-045420.jpg

Once that was clear and the guard removed I had to raise the deck, as this is the position where the belt disengages by removing the tension. I had to push the deck forward with a good deal of force (I should mention that the tractor was back on all four wheels at this point) to make the belt loose enough to get around the pulley again.
Once that was done I lowered the deck, re-attached the guard and was back at work mowing. This really was not too bad, as far as the cause of the non-functioning mower is concerned. It could have been anything from a broken belt to a damaged pulley, or other things that would have been much more difficult and costly to repair.

Back in the Groove!

18 Aug

Wednesday after work, I was able to solicit the help of our good friend Jimmy again to “help unload the grill from the truck”, I’ve been driving around with since Sunday. While he was here, I figured I might as well put him to work with some other heavy lifting! Since we discovered a surplus of beer in our keg from the camping trip (due to a pinched line which made us think it was empty when it wasn’t) we hooked it up again at home. Ice isn’t a very efficient way of keeping it cold, so it was time to pull the keg fridge out of the garage and fire it up. And while we were at it, the main unit of the table saw was on top of the keg fridge, so we brought that down to the basement where it belongs.

20110817-103214.jpg
Now two large items are out of the garage where they were making it pretty tight to get the car in, and also not serving their respective functions- cutting wood and cooling and dispensing beer.

When Corinne got home, we finished hooking up the keg and cleaning up, then we were finally ready to get back to deck work. We switched out the shims on the header closest to the sliding door with pressure treated ones, and then began installing a couple of the joists by the sliding door. We had to do a little figuring and measuring so we got two done before we decided it was too dark and we were being too noisy to continue. But we’re on our way and it should go relatively smoothly for the rest of them.

20110817-104252.jpg